One of the very first things that HOOKED me into DIGITAL SCRAPBOOKING was "out of bounds" scrapping. That's where a little part (or a big part) of the picture comes out of the frame. Maybe it's a secret desire to color outside of the lines that makes this style of scrapping appeal to me so much. I'm sure my kindergarten teacher would NOT approve!
Let's face it though...some pictures simply BEG to have something hanging out! Even the smallest out of bounds detail can add so much to a page. This page is a perfect example. The picture alone is cute but the fact that she appears as if she is starting to climb through the frame causes the page to be that much more engaging...if it's okay to use that term for scrapbook pages.

Here's how I did it. I'm using Photoshop CS5 but any photo editing software that allows for layers would work out fine for out of bounds work.
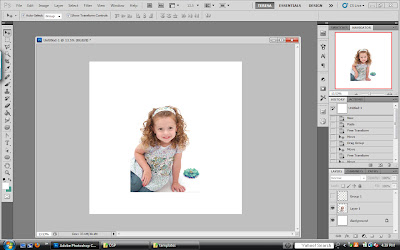
I start with the photo. Like I said, "Cute photo" but lets have some fun with it.
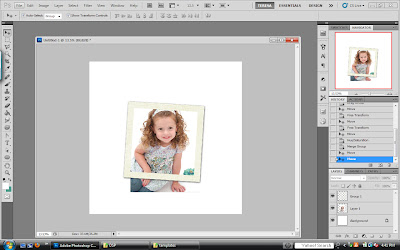
I pick out my frame that I'm going to want her to "start to climb through". I simply lay the frame over the picture and size the photo so that her hand and the top of her head will be covered.
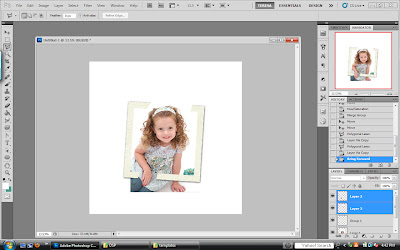
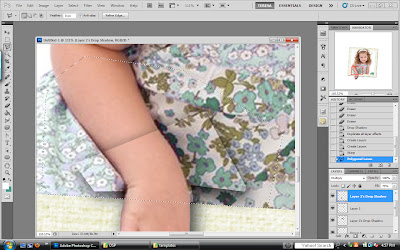
Then I use my polygon lasso tool to create two new layers copied from the original photo. One is her hand and one is the top of her head. The the layer of her hand includes quite a bit of her forearm and the top of her head includes some of her forehead. This ensures that the frame will be covered. I move them up in my layers list so they are sitting on top of the frame. They do not have to be perfect because I will fine tune these layers in the next step.
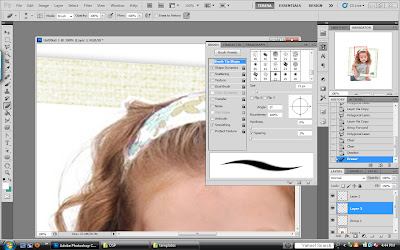
Still using the polygon lasso tool, I clip away a lot of what I don't want until I get just a little bit of background left. Then using a small soft eraser tool, I clean up the edges of my two new layers. There are many ways to do this step, the soft eraser just happens to be my favorite. In my opinion, the soft edge actually looks better.
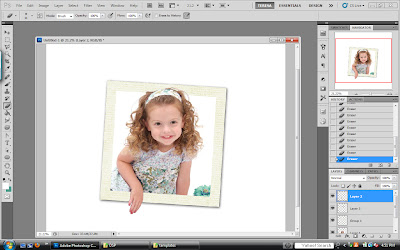
So now it's all cleaned up and the layers are ready to go. They are not quite popping out yet. We need a drop shadow for that.
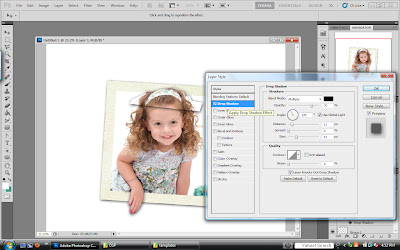
Using settings similar to this, apply a drop shadow to each layer. You can see now just what I included in my layers. You can also see that I'm lazy and only clean up the edges that I know I'm going to need to. The extra drop shadow gets removed later so it really is no big deal that there's drop shadow hanging out where it doesn't need to be.
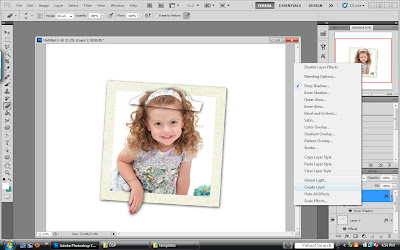
Now comes the hard part...just kidding...it really is not that hard. The drop shadow needs to be it's own layer so that it can be manipulated a bit and cleaned up. I do that by clicking my right mouse button on the word "effects" in the layer list for that layer and UP POPS this menu list. Click on Create Layer. You'll likely get some warning about how "some aspects of the Effects can not be reproduced with layers." We don't care, click okay.
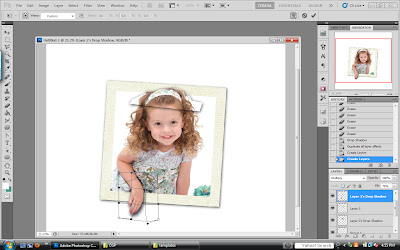
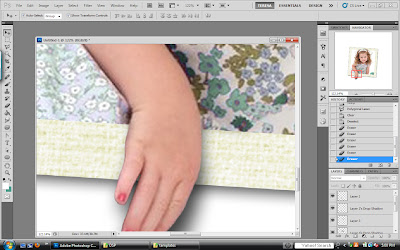
Now comes some of that manipulating I was talking about. I love the warp tool for this but I imagine you can use a smudge tool if you don't have warp. The goal is simply to give the bottom of her hand a little more drop shadow than the top because that's how it would be if she were indeed trying to climb out of the photo. I did a wee bit on the top of her head but not much. Keep in mind where your lighting source is. The designers at Digital Scrapbook place use a drop shadow with a direction of 120 degrees. SO...using 120 degrees as my guide, I dragged the drop shadow under her finger tips outward in that direction.
Now comes the drop shadow clean up. I simply use the polygon lasso tool to clip the drop shadow off of the top of the photo. I used the edge of the picture frame as my guide.
And that's how it looks. It might take a couple of tries to get the drop shadow manipulated just right so that it looks real after you've clipped off the extra but it's worth it.
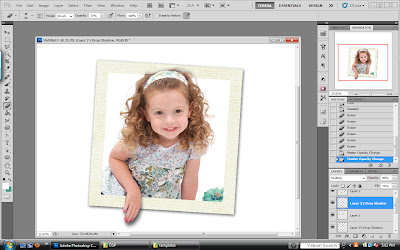
SO here's my photo now. To make it easier when I'm working on the rest of the layout, I group all of these layers together so that nothing gets out of alignment. You could merge them too if you prefer.
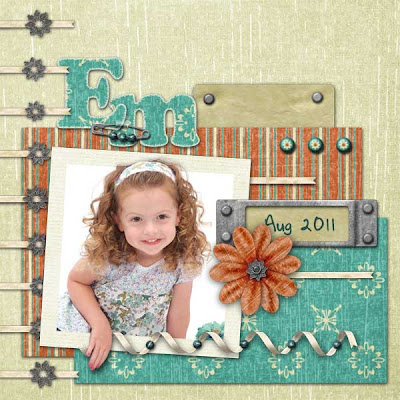
For this layout I used my
Summer Linen Digital Scrapbook page kit which is available for purchase at
Digital Scrapbook Place.
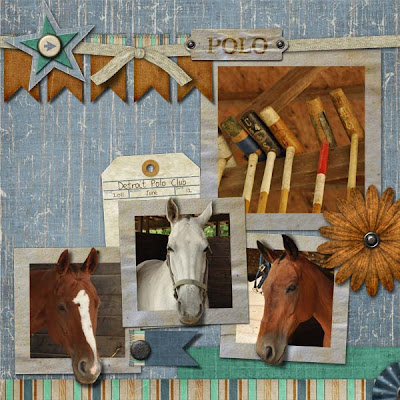
I guess this is my Mr. Ed layout. These are just a few of the horses that can be found at the polo stables in the residential development behind my house. I used my
Summer Country Page Kit,
Summer Country Add On Pack, and the
Summer Country Paper Set.
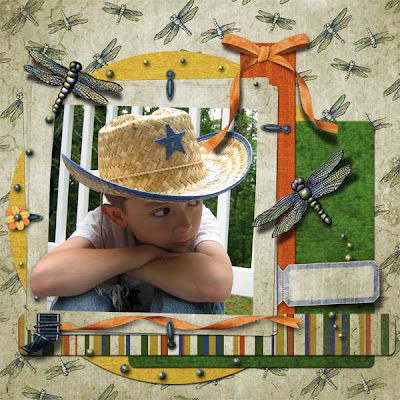
This is one of my favorite pages. Just simply having his elbow sticking out makes it appear as if his hat is sticking out too. I used
Dance of the Dragonfly Page Kit,
Dance of the Dragonfly Add on Pack, and
Dance of the Dragonfly Paper Set for this page.
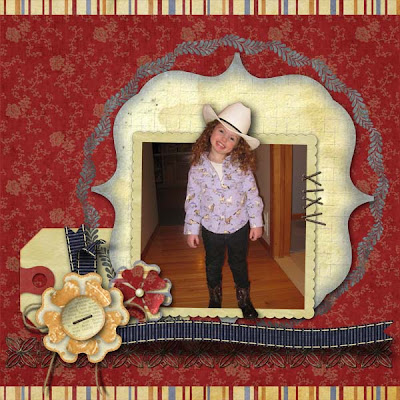
She is just too cute. This is a PERFECT example of why out of bounds is so great!! This photo was a lot taller than it was wide. I was NOT going to get her full outfit into that square frame. What a shame that would have been for sure! So I performed a little bit of out of bounds magic on the hat as well as the one boot that she had just a step forward on the floor and made it look as if she were stepping right out of the frame. I used my
Rodeo Ready Plopper for this page. Ploppers make pages like this way too easy! The Plopper was made from the
Gone Country Page Kit,
Gone Country Add on Pack, and the
Gone Country Paper Set.
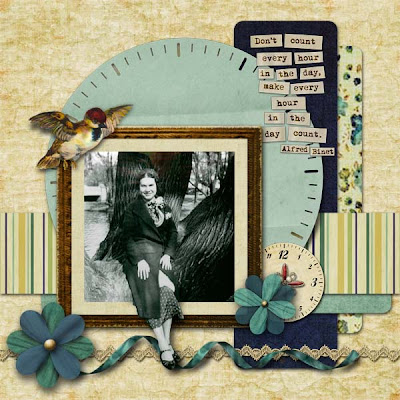
Here's another photo that was not going to fit into a square frame. So I let Grandma sit with her legs hanging out of the frame. She looks lovely, doesn't she? This page can be made up quickly with a Plopper as well. This one is called
Imagene Doll. Imagene Doll is a delightful character from three of
Lisa Wingate's books. I had so much fun reading about her that I simply HAD to make a line Digital Scrapbook products just for her. She has her own
Imagene Doll Page Kit,
Imagene Doll Add on Pack, and
Imagene Doll Paper Set.
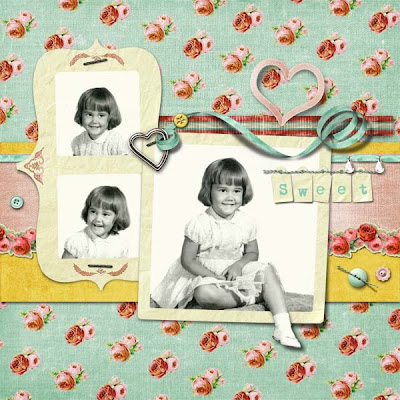
I can NEVER resist a well placed little foot hanging out. This page uses my
Just Plain Sweet Page Kit and
Just Plain Sweet Add on Pack.

Now, this page looks hard but it really is not. I used my
Simply Sweet Plopper and used that same technique but with the entire image. I used the drop shadow effect and then created a layer out of the drop shadow. Then I just skewed the drop shadow so it looked as if she were walking into her shadow. Then I lowered the opacity of both the girl layer and the shadow layer so that the texture and color of the background came through. For the other images, I desaturated all of the colors except for the pink so that the page wasn't so busy with color.
I hope you've enjoyed this Out of Bounds tutorial. Let me know if you've tried it. I'd love to see your work!


 adore
adore


